USER INTERFACE |
The user interface allows the GiD user to interact with the program. It is composed of buttons, windows, icons, menus, text entries and graphical output of certain information. The interface can be configured by the user who may use as many menus and windows as required for its application.
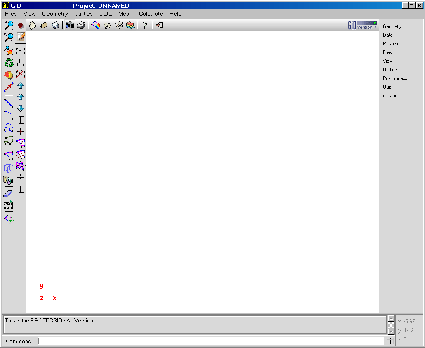
The initial layout of GiD is composed of a large graphical area, pull down menus at
the top, 'click on' menus on the right side, a command line at the bottom,
a message window above it and a icon bar. The project that is being run is written on the
window title bar. The pull down menus and the 'click on' menus are used to access GiD commands quickly.
Some of them offer a shortcut for an easier access,
which is activated by clicking at the same time the keys Control and the letter
that is displayed.
The right mouse button pressed over the graphical area, opens an on-screen menu with some visualization options. To select one of them, use the left or right button; to quit, select the left button anywhere outside the menu.
First option in this menu is called Contextual. It will give different
options related to the current function that is being used.
The pair of icon bars contain some facilities that
also appear on the graphical area of the window or on the menu bar.
When clicking on the icon with the left mouse button, the corresponding command
is performed or an icon menu with several options will be shown. While when clicking
the right (or center, when this exists) mouse button, a menu with the options help and
configure toolbars will appear allowing the user to get a description of the icon or
to configure the position of the toolbars. The description appears also when the mouse remains
quiet for a couple of seconds inside the icon.
To configure the toolbars position and view, the Toolbars position window can be called from
Utilities > Tools > Toolbars or clicking with the right mouse button over a toolbar.
Using the Toolbars position window it is possible to enable the Right buttons menu. Only advanced users should use these buttons.

Toolbars position window
The Standard bar has common options for both pre and post-processing parts like open, take a snapshot, print, preferences, help, exit and others.

Standard toolbar
The different icons represent, from left to right:
- New
- Open
- Save
- Take a snapshot
- Toggle between preprocess and postprocess
- Copy
- Preferences
- Layers
- Help search
- Help
- Exit
The Geometry & view bar has some common options between pre- and postprocess: the view facilities like zooming, panning, rotating, etc.. But other icons are specific for preprocessing and other for postprocessing.

Icon toolbox menu on Preprocess
The different icons represent, from left to right:
- Zoom in
- Zoom out
- Zoom frame
- Redraw
- Rotate trackball
- Pan dynamic
- Create line
- Create arc
- Create NURBS line
- Create polyline
- Create NURBS surface
- Create volume
- Create object (rectangle, polygon, circle, sphere, cylinder, cone, prism, torus)
- Delete
- List entities
- Toggle between geometry view and mesh view
Note: The position of the icons depends on how the window is positioned.
If the left mouse button is pressed on Delete, GiD opens another window
with the different entities to be deleted: Point, Line, Surface, Volume or All types.
If pressing the left mouse button on List entities, GiD opens another window
with the different entities able to be listed:
Points, Lines, Surfaces or Volumes.
For the post-processing, only the first six commands are the same on the pre-processing

Icon toolbox menu on Postprocess
For the post-processing, the first six commands are the same as preprocess:
from Zoom in to Pan.
The remaining icons represent, from left to right:
- Change Light Vector: allows the user to change the light direction (see section Render).
- Display style: when clicking on it, a icon menu appears, each one for every display option: Boundaries, Hidden Boundaries, All Lines, Hidden Lines, Body, Body Boundaries and Body Lines.
- Culling: allows the user to switch on and off the front faces and/or the back faces.
- Mesh selection
- Set selection
- Cut selection
- Cut meshes/sets
- Set maximum value
- Set minimum value
- Reset maximum and minimum values
- List nodes and elements information
Notes:
If windows are used to enter the data, it is generally necessary to accept this data before closing the window. If this is not done, the data will not be changed.
Usually, commands and operations are invoked by using the menus or mouse, but all the information can be typed into the command line.
In Windows the secondary windows appear generally in over the main window and
cannot be hidden by it. This behaviour can be changed deselecting the Always on top
flag in the Window system menu (press second button over the windows bar to achieve it).
Mouse operations |
The left mouse button is also used to make selections, selecting entities or opening a box (see section Entities selection) and to enter points in the plane z=0 (see section Point definition).
The middle mouse button is equivalent
to escape (see section Escape).
The right mouse button opens an on-screen menu with some visualization options. To select one of them, use the left or right button; to quit, select the left button anywhere outside the menu.
First option in this menu is called Contextual. It will give different
options related to the current function that is being used.
When the mouse is moved to different windows, depending on the situations, different cursor shapes and colors will appear on the screen.
In some windows, help is achieved pressing button-2 or button-3 over one icon.
Command line |
All commands may be entered via the command line (placed on the bottom of GiD window)
by typing the full name or
only part of it (long enough to avoid confusion); case is not significant.
Any command within the right side menu can be entered by the name given there
or by a part of it. Special commands are also available for viewing (zoom,
rotation and so on) and these can be typed or used at any time when working or
from within another function. A list of these special commands is given in
View (see section VIEW).
Commands entered by typing are word oriented. This means that the same
operation is achieved if one writes the entire command and then presses
enter or if one writes a part of it, presses enter and then
writes the rest.
All these typed commands can be retrieved with the use of the up (to recover) and down arrows (to come back).
Go to the first, previous, next, last section, table of contents.